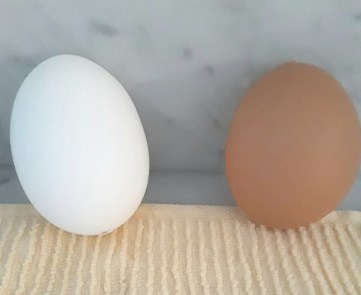
These Easter eggs are super easy and not as messy as using dye. Tissue paper has always been an attraction for me, along with glitter and colored foil!
As you overlap the tissue paper on the egg, Eric Carle’s picture books will come to mind. Maybe it’s a good time to pull them out, for inspiration.
You can make these eggs hard-boiled or blown-out. The advantage to blown-out eggs is that they can be saved for next year!
Want to increase your Spring decorating IQ? Visit My Thrift Store Addiction for inspiration and guidance. Looking for color combinations that bring a bright yet cozy feel to your home? Debby Goes Shabby is one of my favorites.

Materials:
- eggs (hard-boiled or blown-out)
- tissue paper
- glue (white glue diluted 50%, or decoupage glue)
- paint brush for glue
- damp rag for messy hands, dripped glue, etc.
- heavy paper or poster board (small 1″ x 6″ strips)
- tape
- scissors
Before you begin
If you are using hard-boiled eggs, cook them and cool them to room temperature.
If you are using blown-out eggs and need directions, see the note below.
Method:
1. Tear and/or cut a variety of tissue paper colors.
2. Make egg stands by cutting a strip of heavy paper and taping it into a circle.

3. Cover part of the egg with the diluted glue. Place pieces of tissue on the egg, overlapping as you like. Use one color, or a variety of colors.

4. Smooth the tissue out by applying glue over the tissue, as well as under it.

Let dry on egg stand.
Easy and beautiful! Your eggs are a color of their own!
Note: How to blow out eggs.
Clean off the eggs with soap and water.
Use a long hatpin or stick pin to carefully make a small hole in both ends of your egg. Stick the pin far into the egg and break the yolk by sticking and swirling the pin.

Keep the pin handy. You will need it as you blow out the white and yolk, to unplug the hole.
Cup the egg securely in one hand and pierce and chip with the other. This keeps the egg (most of the time) from breaking open. Be careful with that pin!
The holes will need to be bigger than the pin, so carefully poke and chip away until the holes are about 3mm in diameter.
Over a bowl, seal one hole with your lips and blow the insides of the egg out the other end. If the hole gets plugged, insert the pin to unplug it. You may need to pull out the cords, etc. You’re finished when you start blowing only air from the other end.
Rinse the egg, trying to get water into the inside of the shell to further clean it. Blow out the excess water.
Set the egg, end side up, on a towel against the kitchen counter back splash, and allow it to dry.

? -Jo
© 2018 auntjoannblog.com. All rights reserved. See Legalese tab for permissions.


You have a happy Easter, as well! Thank you for your kind words 🙂
Our family loves Eric Carle so these eggs are EGGCELLENT! Thank you so very much for linking to the Spring and Easter Joys party. Have a very Happy Easter!
You, too! I thought that today would be a slow one, but with your fun Linky Party, I’ve got my hands full learning new things!
Oh I love these! Thanks for the shout out to my blog ~ I’ll be sharing these on Instagram later today! Have a blessed Easter weekend!